![]()
![]()
You cannot use the Corporate Action Wizard for manually created transactional accounts. However, you can use it for accounts imported through the Microsoft Excel - Transactions interface. If you have a manually created transactional account, you can establish a Microsoft Excel account mapping so that the Corporate Action Wizard can be used.
Create an Excel spreadsheet with columns for Client Name, Account Number, Transaction Date, Transaction Type, Ticker, and Shares.
Enter the Client Name and Account Number. All other columns can be blank.

Save the spreadsheet.
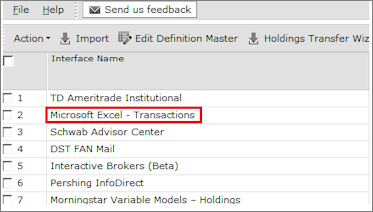
Import the spreadsheet using the Microsoft Excel - Transactions interface.
Make sure the File Contains Header Line option is checked. Click the magnifying glass next to File name and select the spreadsheet.

Under the Column list, map the Client Name, Account Number, Transaction Date, Transaction Type, Ticker, and Shares fields to the corresponding columns on the spreadsheet.
Make sure the Custodian is set to Microsoft Excel - Transactions. Click the Import button.
From the import blotter, click on the New Accounts blotter.
Click the magnifying glass for Mapped Client Name and select the correct client within your database.

Click the magnifying glass for Mapped Account Name and select the manual account that you want to establish the mapping for.
Click Save at the top of the blotter screen.
Click Post at the top of the blotter screen.
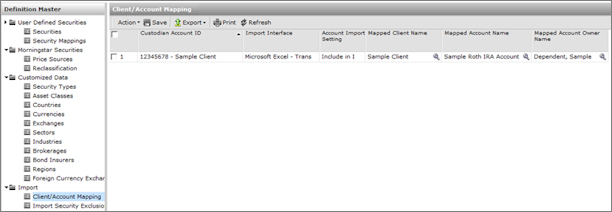
Now when you go into the Definition Master, you can see a Microsoft Excel mapping in the Client/Account Mapping section.