
Overview
Once you have configured the CWP, and granted clients access to it, you can undertake the process of posting content to the website.
Note: In addition to reports from Morningstar Office, you can post other files to the CWP as well, such as a newsletter.
This section explains how to post content, remove content, and monitor client usage on the CWP:
You can post reports to the CWP for multiple clients at once. To post a report to the CWP from the Reports tab, do the following:
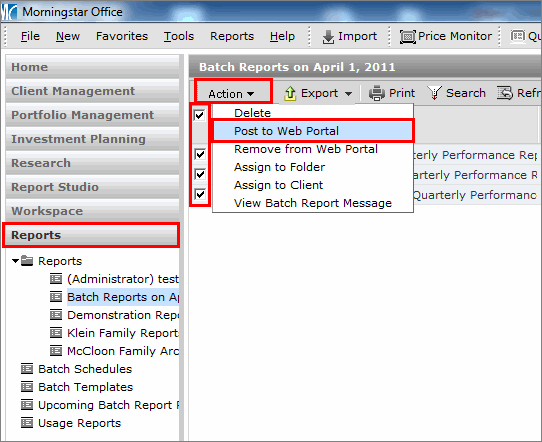
In the left navigation pane, click the Reports tab. The Reports area opens.
If necessary, navigate to the folder where the reports you want to post are saved.
Check the box(es) next to the report(s) you want to post.
From the Action menu, select Post to Web Portal.

A confirmation message appears. Click OK.
Click OK when the second confirmation message appears.
To post a report to the CWP from the Client Management tab, do the following:
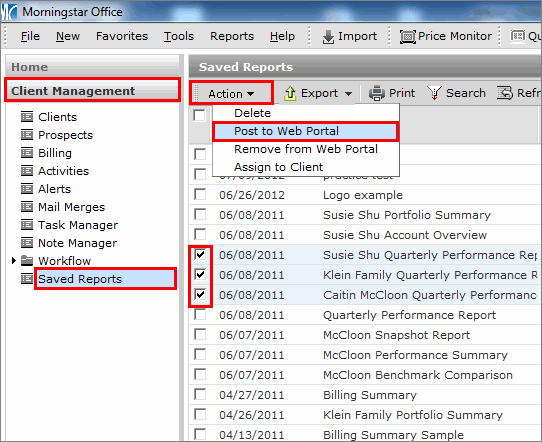
In the left navigation pane, click Client Management tab, then go to the Saved Reports page.
Check the box(es) next to the report(s) you want to post.
From the Action menu, select Post to Web Portal.

A confirmation message appears. Click OK.
Click OK when the second confirmation message appears.
To post a report to the CWP from the Portfolio Management tab, do the following:
In the left navigation pane, click the Portfolio Management tab, then go to the Saved Reports page.
Check the box(es) next to the report(s) you want to post.
From the Action menu, select Post to Web Portal.

A confirmation message appears. Click OK.
Click OK when the second confirmation message appears.
You can post files (such as a newsletter in PDF format, or an Excel spreadsheet) from outside of Morningstar Office to the CWP as well. Posting these files consists of the following steps:
Upload the file to Morningstar Office.
Assign the file to a client (or clients).
Post the file to the CWP.
Alternately, you can also elect to save the file to a folder before posting it to the CWP.
To post an external file to the CWP, do the following:
In the left navigation pane, click the Reports tab, and select the Reports page.
You can also do this procedure from the Saved Reports page of the Client Management, Portfolio Management, Investment Planning, Research or Workspace tabs. Uploading the document from the Reports tab, though, allows you to assign it to a folder you use for your CWP.
Click the Upload Document icon (above the spreadsheet area). The Open dialog box opens.

Select the file you want to upload to the CWP, then click Open. The file now appears at the top of the Reports page.
Check the box to the left of the file to select it.
From the Action menu, select Assign to Client. the find Clients dialog box opens.
Click Go to find the client(s) to which you want to assign the file.
After adding the client(s) to the Selected Records area, click OK to close the Find clients dialog box.
From the Action menu, select Post to Web Portal.
A confirmation message appears. Click OK.
Click OK when the second confirmation message appears.
If you have a number of files outside of Morningstar Office that you’d like to upload at once, you can use the Batch Upload tool. The Batch Upload tool allows you to upload not only multiple outside files at once, but also to post them to multiple clients as well.
To upload a batch of documents to the CWP, do the following:
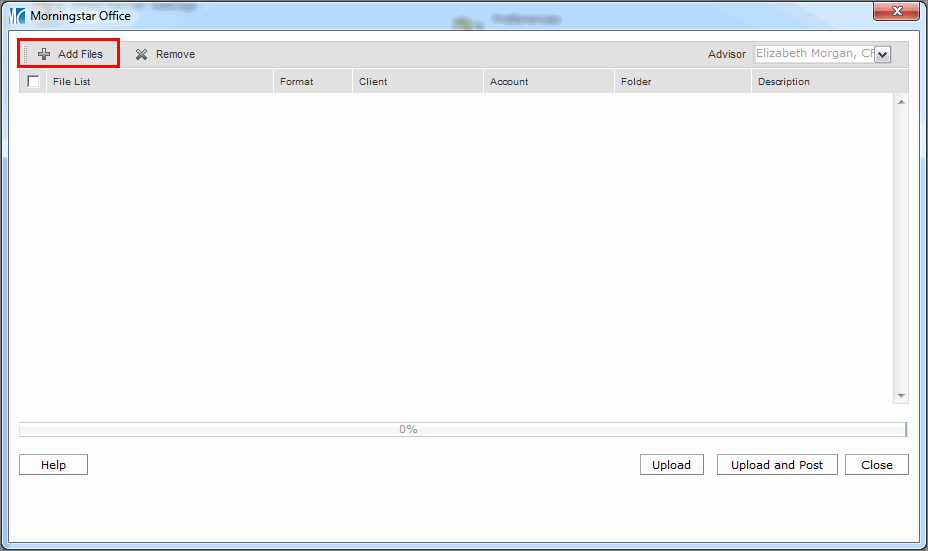
From the menu at the top of the Morningstar Office screen, select Tools, and then Batch Document Upload. A dialog box opens:

At the top of the dialog box, click the Add Files icon. The Choose Files to Upload dialog box opens.

Select a file you want to upload.
Repeat steps 2-3 for each file you want to upload.
In the Client column, select the client(s) for whom you would like each file to appear on the CWP.
In the Account column, select the account you would like to associate with this file.
If you selected multiple clients in step 5, you cannot select an account to associate the file to.
In the Folder column, select the folder to which each file will be assigned.
When you have loaded all files and made all assignments, click Upload and Post.
Click Close.
Occasionally, you might need to remove content from the CWP. For instance, perhaps you want to remove reports older than 12 months. You can do this by selecting either individual records, or multiple records at once.
To remove content from the CWP, do the following:
In the left navigation pane, click the Reports tab, and select the Reports page.
If necessary, select the folder which houses the item(s) you want to remove.
Check the box(es) next to the report(s) you want to remove.
From the Action menu, select Remove from Web Portal. The item is removed from the CWP. The next time your client(s) logs in, the item(s) will no longer be seen.
Now that you have configured the CWP, granted clients access to it and posted reports for them, you can monitor whether they have done the following:
posted files for you to see
logged into the CWP, and
accessed certain tabs in the CWP.
To monitor your clients' usage of the CWP, do the following:
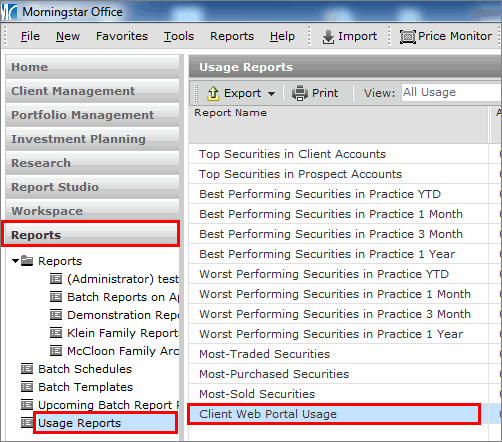
In the left navigation pane, click the Reports tab, then go to the Usage Reports page.

Double-click Client Web Portal Usage. The Client Web Portal Usage window opens. Any files your clients have uploaded will appear here. You can also use this window to monitor your clients' login frequency to the CWP, and which tabs they have visited.
If a client has uploaded a document, double-click the row. The Client window opens.
Select the Reports page from the Clients window.
Double-click the file you want to see. It open in a new window.
To post the file to the CWP, select the box next to the row on the Reports page in the Clients window, then use the Action menu to select Post to Web Portal.
A confirmation message appears. Click OK.
Click OK when the second confirmation message appears.
 See Also
Configuring / Designing the Client Web Portal
Administering Access and Use of the Client Web Portal